Christmas craft ideas can answer the age old question: What's red and green, covered with stars and glitter? Christmas crafts of course!
There are a few things that seem more decadent at the holidays than enough time to sit and do nothing but craft. Why not indulge? Your sanity will thank you, and so will your kids. Christmas crafts don't have to be complicated or expensive; all you really need to make it Christmas is the seasonal colors and glitter. Just in case you'd like some help getting the creative ball rolling, keep reading and see how easy and fun Christmas crafting can be.
Key Points
- A hand and foot print reader is a great way to preserve the memory of your small child's little hands and feet.
- Homemade snowflakes are a classic craft that many generations have enjoyed.
- Popcorn balls are a fun, yummy snack that everyone will enjoy making and eating!
Hand and Foot Print Reindeer

©Elena Hramova/Shutterstock.com
This little craft is a must for parents of young children. The reindeer are simple, and become a keepsake of those precious hands and feet when they were still small. The basic supplies you will need are: scissors, glue, a pencil, brown construction paper, and crayons. To begin, trace both hands and one of your children's feet. Cut out the hands and feet. Very young children may need some help cutting out the hands, or you may end up with hurt fingers.
To make the reindeer, glue the hands to the heel side of the footprint cut out. Arrange the hands so the fingers look like antlers. Now that the reindeer is assembled let your child decorate them with the crayons any way they wish. If you want to jazz this little project up a bit use glitter, googly eyes or puff balls for a nose. Using two different colors of brown paper for the antlers and head creates more visual interest.
Snowflakes
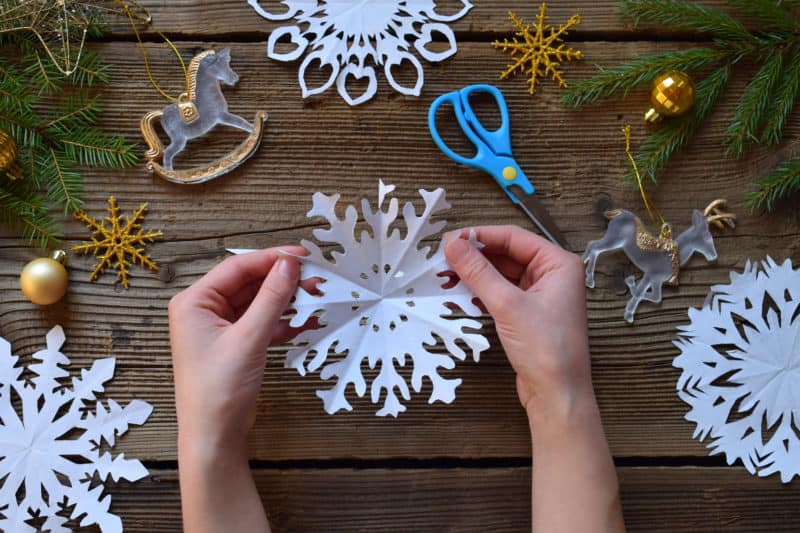
©Oksana_Slepko/Shutterstock.com
Snowflakes are fun, and except for the paper clippings create little to no mess. Avoid clipping clean up by using a big blanket or table cloth on the floor under the cutting area. Other supplies you will need are scissors for each child and white or icy blue paper. Take a few moments to show the kids how to fold the paper so they can make snowflakes, then let them go nuts with the scissors.
When all the cutting is done you can use fishing line, or another translucent string, to hang them from the ceiling to create your private indoor snow fall. Tape them to windows and doors to make the look of your winter wonderland just perfect.
Advanced snowflakes 101: If your crew just won't settle for run of the mill snowflakes, you'll need to add a bit more than paper and scissors to your craft. Using specialty paper from the craft store is a great way to create one of a kind snowflakes. Paint the finished flakes with white glitter glue to add an icy diamond finish to your flakes. Lastly, learning how to fold the paper so that the flakes have six or eight points instead of the regular circular or square shape will make them look just right.
Candy Cane Felt Mouse
This is one rodent that is welcome at any holiday gathering. Needed supplies are: scissors, black yarn, grey and pink felt, Elmer's glue or hot glue, and candy canes.
Cut the body of the mouse from grey felt. The shape should be a tear drop about 3 ½ inches long. You can decide how skinny or fat your mouse is. To avoid wasting felt, make a template on scrap paper. When you get the shape you like cut two pieces of felt for each mouse.
It is easier to glue the body together before you decorate so the next step is gluing. Hot glue is difficult for kids to use, but Elmer's glue will require a long wait until it is dry before you can continue. Choose your favorite sticking medium and glue the body together. Glue all the way around the outside edges leaving a ½ inch opening at the wide end of the rain drop shape.
Once the body is together add yarn whiskers, a pink felt nose and eyes to your mouse. To make the ears cut two grey circles, and two smaller pink circles. Glue the pink felt to the grey felt and cut a slit in both layers. Over lap the edges of the slit to make the ears stand up a bit, then glue the side down. Next glue the ears to the mouse's head.
Finish the little mouse off by adding the tail. Insert the candy cane into the opening you left when you glued the body together. Leave the crooked end of the candy cane out for a curly tail. If the candy cane slides around too much use a bit of double sided tape to tack it down inside.
Laced Stockings
This fun Christmas craft idea doubles as a game. If you make it from sturdy papers, or laminate the finished project your child will have a quiet activity to entertain them for the duration of the holiday season.
Supplies you'll need: paper, scissors, hole punch, yarn and crayons. Optional supplies: glitter, fabric, felt or pipe cleaners.
Create a template for the shape of stocking you like, and have each child trace it onto a piece of construction paper in the color of their choice. They will need two. Cut out the stockings and use the hole punch to punch out holes about one inch apart all the way around the edge of both stockings. To be sure that the holes line up either use a paper clip to hold the two stockings together and punch them at the same time. Or, punch the first one then place it on top of the second. Use a pencil or crayon to mark where the holes should be placed on the second stocking.
At this point you can add yarn for lacing, and be done. If you'd like to create more one of a kind stockings decorate them, and then decorate them some more. A few fun decoration ideas include adding stripes. Use crayons to color stripes, or cut stripes from another piece of construction paper and glue them on. Create a character on your stocking with scraps of construction paper or with markers and crayons. Add a Christmas poem to the front. Glitter, brick-brack, ribbons and bows also add fun effects.
Whatever you choose keep in mind you'll want it to be flat so the lamination will work. After laminating you will need to punch the holes again. (Punching the holes just once after you laminate is a good idea, but if the stockings are thick and you will need a really sturdy, sharp hole-puncher.)
For ease lacing cover the ends of the yard in tape. This creates a stiffer end for the kids to lace, and prevents fraying.
Luminaries
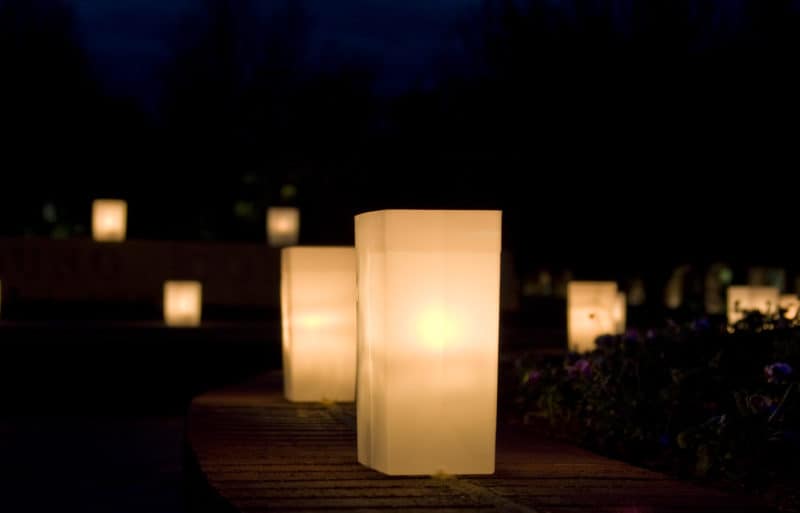
©JP Lavoie/Shutterstock.com
Luminaries are not only fun, but play double duty as party decorations and center pieces. A little extra care should be taken if you plan to use them outside or with actual candles. To use luminaries to light up your outside walkways you'll want to choose paper bags that are likely to be more weather proof. Flimsy, inexpensive paper lunch sacks may not last the evening. Use bags with heavier paper. Plain gift bags are a good choice.
To use with real lighted candles add a few inches of sand to the bottom of each one. Nestle the candle into the sand in the center of the bottom. This will keep the flame well away from the bag as well as provide weight that will prevent the luminary from shifting or tipping in a breeze. If you like the idea of lighted luminaries, but not the idea of real candles, use battery operated tea lights.
When you have chosen your bags making the luminaries is easy. You'll need scissors or dye cuts; a hole punch sometimes comes in handy. When choosing patterns keep in mind the ages and abilities of your helpers. Young children will do better with simple patterns or dye cuts. Older kids will like the challenge of more intricate patterns.
Make a template then trace it onto the bag. Use the scissors or dye cuts to cut out the pattern. Use spray on glitter to add a shimmer to the finished product!
A shortcut: Don't cut the patterns out at all. Instead use very thin paper bags (white will work best) and glue a pattern onto the bag. Snowflakes, Santa faces, or snowmen made of heavy construction paper are good choices. You can make them out of paper the same color as the bag so they disappear, or use colorful paper so they stand out.
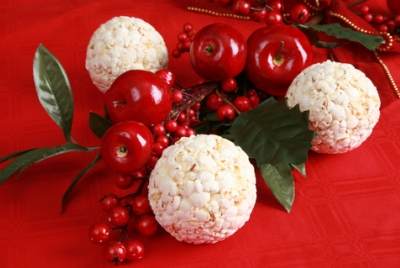
Popcorn Balls
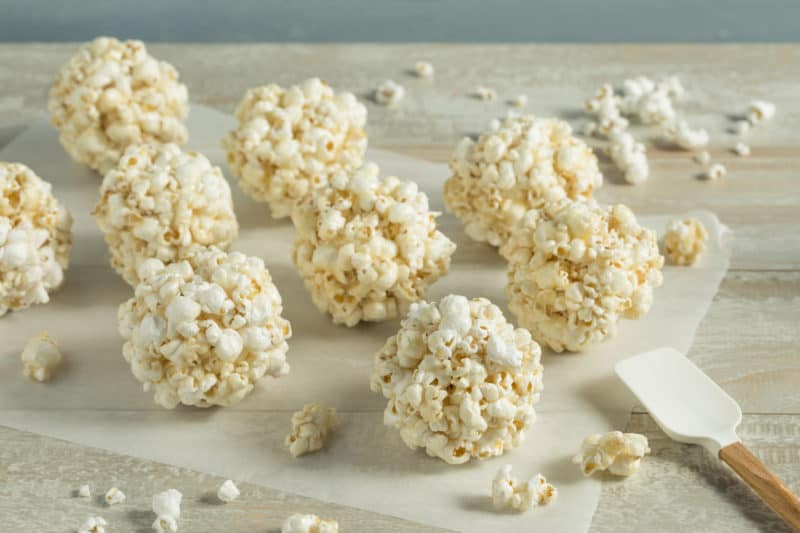
©Brent Hofacker/Shutterstock.com
Easy, fun and delicious: popcorn balls are simple Christmas craft ideas you can give to neighbors for a treat, or eat them yourself as a reward for having been so good all year long. In case you need a recipe, or would like to try a new one, here are few tried and tested popcorn recipes.
Marshmallow Popcorn Balls
1 Tablespoon vegetable oil
½ cup unpopped popcorn
6 Tablespoons butter
1 teaspoon vanilla
5 cups miniature marshmallows
*If you are popping the popcorn in an air popper, omit the oil. You can substitute 4 quarts of popped microwave popcorn if you wish.
Step one: Pop the pop corn and set aside
Step two: Melt butter and marshmallows in microwave (about 2 min) do not over cook.
Step three: Add vanilla, stir, and combine with popped corn.
Step four: Wait until cool and form into popcorn balls.
Jazz it up a bit: Add food coloring or decorate the balls with colorful candy or mini chocolate chips. Like the idea of color, but want to add a bit of flavor too? Omit the vanilla and add a bit of your favorite flavor of Jell-O to the mix. This adds a fruity punch as well as holiday color.
Classic Carmel Popcorn Balls
2 quarts popped popcorn
1 cup brown sugar
1/4 cup butter (real butter, it won't turn out with margarine)
1/2 teaspoon salt
equal parts water and dark corn syrup (about 1/3 cup of each)
1 teaspoon vanilla extract
Step one: Pop the popcorn and set it aside.
Step two: Combine the next five ingredients (leave vanilla out) in a sauce pan and bring to a boil stirring frequently. Boil, without stirring until candy thermometer reads 270°F. Remove from heat and add vanilla.
Step three: Pour over popcorn. Stir to insure an even coat.
Step four: When it is cool enough to touch shape into balls.
A few tips to make these treats easier to create and eat: coat your hands with butter or non-stick cooking spray before shaping them into balls. You can put sandwich baggies over your hands like gloves. This works well too.
To make these treats easier to eat, add a popsicle stick to each popcorn ball before they cool completely. To use as an edible Christmas tree ornament, simply make a loop of ribbon or yarn and embed the ends deep in the popcorn ball. It will hold itself together when it cools. This is one of the tastiest Christmas craft ideas yet!
How Can I Be Inspired to Come Up With My Own Crafts?
If you want to really put on your creative hat and come up with your own crafts, then we've got some tips for you! Generating your own craft ideas can be a little tricky, but with a little trial and error you'll surely come up with a great idea for your family to try out.
Consider your goals. Are you aiming to create something that will last, or is it okay if this craft falls apart after a Christmas or two? Are you looking for something that will keep your kids busy for hours, or just for a little while?
Think about your audience. If you've got older kids, they'll want something a little more complicated and engaging. If you've got younger kids, think about ideas that are easy for their small, inexperienced hands. You'll also need to make sure you account for the fact that older kids sometimes have less free time than younger children.
What supplies might you need? While some ideas might be great on paper, they're hard to execute because they require very niche supplies. It's a good idea to think through all of the supplies you might need for a craft before committing to trying it out. Make a list, and try to be as thorough as possible.
Do you plan on putting this craft on a blog or teaching it to others? If you want this craft to go beyond just your family, you'll need to create a step-by-step guide that others can follow. Ideally, you'll want pictures of each step to make it as easy as possible for others to follow along. Try to keep each step relatively concise; you don't want to confuse people with convoluted explanations! A craft idea you came up with on your own is a great addition to any blog!
These Christmas Craft Ideas are just a small sampling of the fun and creative crafts you can enjoy making with your kids at Christmas. Other simple and fabulous ideas include: Christmas placemats, paper bag Santa puppets, cotton ball snowmen or nutmeg oranges. Get crafting, and have a Merry Christmas.
The image featured at the top of this post is ©James R. Martin/Shutterstock.com