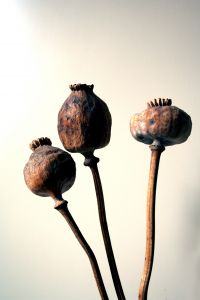
Making arts and crafts is a lot of fun, especially if you are able to do it with things from nature. The outside world is filled with so many wonderful things. The types of crafts that can be created are unlimited.
Things such as wreaths, jewelry, and mirrors are just a few of many examples. A good field trip outside to collect items found in nature is a great activity for exercise, education, and pleasure. Crafts made from scratch make excellent gifts, and by giving out crafts made from nature, it almost feels like you’re giving away a piece of the Earth.
Here are some craft ideas using items made from Mother Nature:
Seashell Wind Chime
Do your kids collect shells at the beach? How about making something crafty from those shells? Next time you walk on the shore, grab as many shells as you possibly can. Shells tend to be kind of fragile, so it's best to have extras just in case a few break.
Next, get ready with your other supplies. Have some fishing wire, a Phillips head screwdriver, scissors, and a curved branch or something similar ready to go. Once these items are ready, wash out the shells and make sure that they are completely clean. After that task is completed, use the Phillips screwdriver to bore a hole in the shell. Children may ask the adults to perform this part.
Measure out some fishing line and cut it. Then, thread it through the hole in the shell and tie a knot to hold it. Tie the other end of the fishing wire to the curved branch. You can repeat this activity by adding more shells to the wire or by adding more wires with a shell to the overall wind chime. That is up to your child’s preference.
You can be as creative as you want to be by decorating the branch or by adding various shell shapes. In order to complete this craft, grab more fishing line, tie it to both ends of the branch, and hang it from a hook.
Scented Rocks
This activity creates very pretty craft items. Here’s what you’ll need:
• ½ cup flour
• ½ cup salt
• ¼ teaspoon of essential oil
• 2/3 cup of boiling water
• Food coloring
First, mix the flour and salt. Add the essential oil, followed by the boiling water. Add food coloring to the mix. When the mix has cooled down, shape the mix into balls about an inch in size. The dough will harden after a few days. Paint faces, flowers, or designs on the “rocks” for a personal touch.
Rock Necklace
This activity is fun and easy, especially for kids who bring home pockets full of special rocks. All you will need are one of those rocks, some #20 hemp, and a glue gun. Start by cutting a one yard piece of hemp. Using the glue gun, attach the hemp to the back of the rock. Wrap the hemp around the rock a few times and glue to make it secure. Lastly, tie the ends of the hemp together.
Rock Paintings
Why not keep it simple? Crafts that come out of nature don't need to be hard or time-consuming. A simple rock painting is a great way for your child to explore their creativity, without requiring a lot of supplies or help from you.
This is a great activity for a day with bad weather or a birthday party. Have your child explore the outdoors for a suitable rock. If you can't find a good rock in your yard, visit a local park or hiking trail and look around at the rocks there. A good rock for this craft is decently-sized, but not so big that your child can't pick it up and manipulate it. Avoid rocks that are too bumpy; smooth rocks are ideal.
Your child can also grab some extra rocks for when they want to do this craft in the future. Once your child is ready to start, have them grab a rock, some paint, and a paintbrush. Encourage them to make their own design on the rock, and see what they come up with!
Your child can paint the rock entirely in one or multiple colors, paint a cool design, or try to paint some actual artwork on it. For instance, they might choose to paint a sun and some trees. Once your child is done with their project, leave the rock out to dry. Once it's done drying, it can be displayed on a shelf, used as a paper weight, or put out in your garden.
The image featured at the top of this post is ©michelini / freeimages – License / Original
