What do the ornaments hanging on your Christmas tree look like? Chances are, if you're a parent, you have at least a few handmade decorations somewhere in your house. And that's great, because studies show that kids remember holiday experiences more than they remember the gifts they receive. So, chances are, if you make something together with your kids, they'll make a holiday memory, and you'll have another cute decoration for your house.
If you need some ideas, here are 10 fun DIY Christmas decorations you can make with your kids to celebrate the holidays!
Handprint Snowman Bulb

©Nikolay Pustovit/Shutterstock.com
- Instructions: Handprint Snowman Bulb
For this, you will need a shatterproof bulb ornament, white, orange, and black or brown water-based acrylic paint, and your child's hand. Start by painting your child's hand. Then, have them grip the bulb from the bottom for about a minute. Position their hand so the palm creates the snow on the ground, and each finger is one tall snowman. Find a small bowl or jar to hold the ornament on top of until it dries.
Once the white paint has dried, you can paint carrot noses, coal eyes and mouths, and top hats with the other colors of paint. Don't forget to add the year and the child's name or initials in a legible paint color!
How-Tall-Am-I Ornament

©
- Instructions: How-Tall-Am-I Ornament
This one is so simple, and it will be a keepsake for years to come! Each of my children had a teacher who helped them make this ornament at school. We received them as gifts on Christmas morning from the kids.
First, find a festive ribbon or string. We have one ornament that looks like Santa's belt and one that looks like candy cane stripes. Then, you'll need to get a clear plastic bulb ornament that opens, either on the top or on the side, and print or write this on a piece of paper to punch and tie to the ornament:
“This ribbon is very special, as you will soon see. Unwind it, and you will find it's the same size as me!”
It should be easy to guess what to do from here. Take the ribbon or string and unwind it until it's as long as your kid is tall. Then, cut it and coil it inside the ornament. Don't forget to add a name and a year! It's so fun to take the ribbon out every year and see how much they've grown.
DIY Snow Globe Christmas Ornaments
- Instructions: Snow Globe Christmas Ornaments
If you bought clear plastic side-opening ornaments for the last one, save a few for this. Print off some tiny pictures of your family, and pick up some fake snow and/or white glitter, and mini wooden picture frames (around 1-1.5 inches).
Cut out the photos so that they fit inside the small frames and glue them into place. Then, put them inside the ornament with the fake snow or glitter. Glue the ornament shut for your very own mini snow globe!
Perler Bead Cookie Cutter Ornaments

©LI Cook/Shutterstock.com
- Instructions: Perler Bead Cookie Cutter Ornaments
Most kids love crafts that bring them into the kitchen. This is a craft they can actually bake!
You'll need a package of Perler beads (they come in premixed Christmas colors!), cookie cutters (that you don't mind using for crafts only, not cookies), a cookie sheet, parchment paper, ribbon, and an oven. It can also help to have a popsicle stick to poke the beads with.
Preheat the oven to 375 degrees. Cut a piece of parchment paper to fit the baking sheet. Place the cookie cutter on the baking sheet. If you want the cookie cutter to be part of the ornament, apply a little cooking spray to it. If you're going to reuse the cookie cutter (for non-food uses), spray it heavily. Then, arrange the beads inside the cookie cutter in whatever pattern you want! A popsicle stick can help you move the beads around into the right spots. Try to have the beads form just one layer. Then, bake the ornaments for 10 minutes. Allow to cool for 10 minutes before attaching a ribbon.
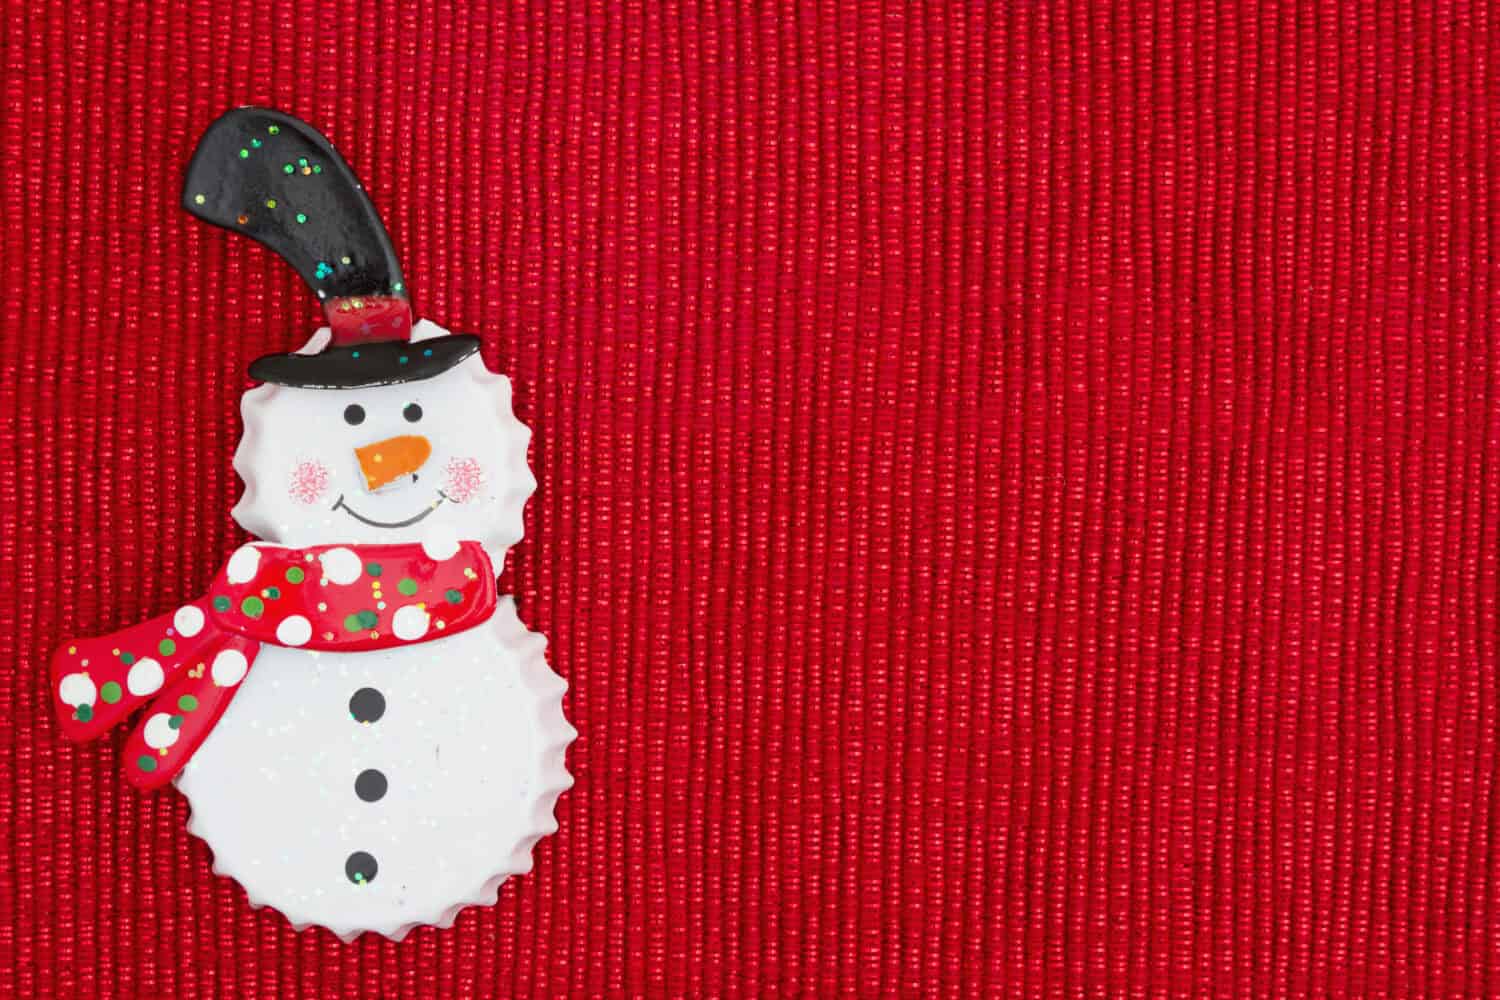
Bottle Cap Snowman Ornaments

©
- Instructions: Bottle Cap Snowman Ornaments
For this craft, you'll need unused metal bottle caps, white acrylic paint, ribbon, markers, and glue — preferably from a hot glue gun. Give each kid three bottle caps and have them paint them white. If you want to see the logo on the top side of the bottle caps, just paint the bottoms, or you can paint the whole thing.
While the bottle caps are drying, cut a wide ribbon into 6-8-inch pieces. Tie one end of each ribbon into a small loop to hang from the tree. Once the bottle caps are dry, draw eyes, a nose, a mouth, and buttons. Then, glue the three bottle caps onto the wide ribbon. If you want, you can tie a narrower piece of ribbon between the first and second bottle caps to make a scarf.
Rudolph Photo Ornament
- Instructions: Rudolph Photo Ornament
Here's another fun photo-based ornament to make with your kids! Gather up some cardboard, portrait-style pictures that you can cut up, glue, brown paint, pipe cleaners, small red pom poms, and glue. Start by cutting the cardboard into circles of 3-4 inches and painting them brown. Then, cut the photos so that the picture covers most of the brown cardboard circle. Once the paint on the cardboard circles dries, glue the pictures to the circles.
Then, punch three holes in the top of the circle. One will be for a string or a hook to hang the ornament. Through the other two, you can string brown pipe cleaners. Fashion them into reindeer antlers in whatever way you want them to look. Add a finishing touch by gluing a red pom pom to the nose of each photo. You can also add brown construction paper ears, glitter, or fake snow if you want to get fancy!
Miniature Winter Hat Yarn Craft

©
- Instructions: Miniature Winter Hat Yarn
Save your too-short yarn bits and toilet paper tubes for this fun and easy decoration or ornament! Cut the tubes into 3/4 inch rings. Then, cut the yarn to lengths of about 10 inches. You can use one color of yarn or various colors, depending on what you want your hat to look like. Fold one piece of yarn in half and put it through the tube. String the two ends over the tube and through the loop. This is called a lark's head knot or a cow hitch. Continue knotting the remaining yarn in the same way until it goes all the way around the tube.
Then, push the loose ends from the side of the tube they are on to the other side to hide the knots. Tie the loose ends together with one last piece of yarn. Puff the ends out, or glue a pom pom on it to finish it up!
Air-Dry Clay Christmas Tree Fingerprint Ornament
- Instructions: Air-Dry Clay Christmas Tree Fingerprint Ornament
Air-dry clay is super fun for kids. It's like putty or slime, but it can be made into a permanent shape. Get some white or light-colored air-dry clay, cookie cutters in the shape of Christmas trees, a multi-colored ink pad, a permanent marker in black or gold, and a silicon mat to complete this project.
First, roll or press the clay to about a quarter inch thick on the baking mat. Then, cut out the shape of the tree using a cookie cutter. If you want to hang this on the tree, punch a hole in the top now. Each person should then imprint their tree with their own fingerprints (without the ink) as many times as it fits. Try pressing in a linear pattern so you can make them look like fairy lights!
After the clay has dried, press each finger onto the ink pad and then transfer the color (and the fingerprint) to the tree. Using the permanent marker, draw a line to represent the string between the lights. Add the year and the child's name so you'll remember which tree belongs to each kid!

©Kara Gebhardt/Shutterstock.com
Kids Handprint Wreath
- Instructions: Kids Handprint Wreath
This is a classic craft, and there are multiple ways to do it. The least messy way is to trace each kid's hand onto a piece of green cardstock or felt and cut out multiple copies of it. Then, paste it onto a ring of cardboard. A paper plate also works in some cases, or you can cut a ring out of a delivery box. Decorate the wreath with red pom poms or red felt dots to represent berries.
My kids' preschool had a variation on this. They took a piece of burlap, around 8 inches by 12 inches, and had each kid make paint handprints onto the burlap. Each child added their own glitter and red dot decorations. This is a little more durable than a standard piece of cardboard.
Clothespin Reindeer (or Snowmen)
- Instructions: Clothespin Reindeer (or Snowmen)
My daughter's class has this weird new trend where they decorate clothespins and pin them to each other's backpacks, so when we made these as ornaments for our Girl Scout Christmas tree, they all wanted extras! You just need a clothespin, pipe cleaners, markers, ribbons, googly eyes, and glue. Glue a ribbon through the hole of the clothespin, then add eyes, pipe cleaner antlers (for a reindeer), or a ribbon scarf (for a snowman). Then, draw on the rest of the face with markers!
The image featured at the top of this post is ©karen roach/Shutterstock.com